
When it comes to smart home solutions, a Ceiling Cloth Hanger is one of the most practical and space-saving additions you can make. In modern homes, especially in cities where space is limited, finding the right drying solution is essential. That’s where Hangers Wala steps in with reliable and stylish options designed to make your daily life easier. In this guide, we will explore everything you need to know about Normal and Deluxe Ceiling Cloth Hangers, their features, benefits, and how to choose the best one for your home. What is a Ceiling Cloth Hanger A Ceiling Cloth Hanger is a drying system that is fixed to the ceiling, allowing you to hang clothes efficiently without occupying floor space. It works using a pulley or lift mechanism, making it easy to raise and lower clothes for drying. This solution is perfect for balconies, utility areas, and even indoor spaces where proper ventilation is available. Why Choose Hangers Wala Ceiling Cloth Hanger Hangers Wala is known for delivering quality, durability, and convenience. Whether you choose Normal or Deluxe quality, you get a product designed to last and perform well in everyday use. Here’s why customers trust Hangers Wala: Strong and durable materials Professional installation Space-saving design Affordable pricing options Long-lasting performance Normal Quality Ceiling Cloth Hanger Features The Normal Quality Ceiling Cloth Hanger is a budget-friendly option that offers great functionality for everyday use. Key Features Jindal Stainless Steel Rods Strong and rust-resistant rods ensure durability and long life. Standard Rope Reliable rope system for smooth lifting and lowering. PVC Channel Lightweight and functional channel for basic support. No Warranty Designed for affordability, this model comes without warranty. Free Delivery Convenient delivery to your doorstep. Free Installation Professional installation ensures proper setup and safety. Benefits of Normal Ceiling Cloth Hanger Choosing the Normal model is ideal if you are looking for a cost-effective drying solution. Affordable Solution A great choice for those seeking reliable quality without spending too much. Space Saving Keeps your floor area free and organized. Easy to Use Simple pulley mechanism makes daily use effortless. Durable for Daily Use Strong enough for regular clothes drying needs. Deluxe Quality Ceiling Cloth Hanger Features The Deluxe Quality Ceiling Cloth Hanger is designed for customers who want premium quality and long-term reliability. Key Features Jindal Stainless Steel Rods High-quality rods provide superior strength and rust resistance. Braided Rope Stronger and smoother rope for better durability and performance. Metal Bracket Heavy-duty brackets ensure extra stability and safety. Jindal Branding Assured quality with trusted material branding. Lifetime Warranty Enjoy complete confidence with reliable, long-lasting product support. Free Delivery Hassle-free delivery service. Free Installation Expert installation for perfect fitting. Benefits of Deluxe Ceiling Cloth Hanger The Deluxe model offers enhanced features for a premium experience. Long-Term Investment With a lifetime warranty, it’s a one-time solution for years. Strong and Reliable Handles heavier loads like blankets, bedsheets, and more. Smooth Operation Braided rope ensures effortless movement every time. Stylish and Premium Look Enhances the overall appearance of your balcony or utility area. Normal vs Deluxe Ceiling Cloth Hanger Knowing the differences makes it easier to choose the right option. Feature Normal Quality Deluxe Quality Rod Material Jindal Stainless Steel Jindal Stainless Steel Rope Standard Rope Braided Rope Channel/Bracket PVC Channel Metal Bracket Branding No Jindal Branding Warranty No Warranty Lifetime Warranty Durability Good Excellent Price Budget-Friendly Premium How to Select the Best Ceiling Cloth Hanger for Your Needs Choosing the right Ceiling Cloth Hanger depends on your needs and budget. Choose Normal Quality If You want an affordable option Your usage is light to moderate You need a simple drying solution Choose Deluxe Quality If You want long-term durability You dry heavy clothes regularly You prefer premium quality and smooth performance Installation and Maintenance Tips To get the best performance from your Ceiling Cloth Hanger, follow these simple tips: Proper Installation Always choose professional installation, like the service provided by Hangers Wala, to ensure safety and correct setup. Avoid Overloading Even though the system is strong, avoid putting excessive weight beyond its capacity. Check Rope Condition Inspect the rope periodically to ensure smooth functioning. Why Ceiling Cloth Hangers Are Perfect for Modern Homes Today’s homes demand smart solutions, and a Ceiling Cloth Hanger fits perfectly into that lifestyle. Saves Space No more bulky drying stands taking up valuable floor area. Improves Air Circulation Clothes dry faster when placed higher with better airflow. Keeps Home Organized Maintains a neat and clutter-free environment. Ideal for Apartments Perfect for balconies and compact living spaces. Final Thoughts A Ceiling Cloth Hanger is not just a drying tool—it’s a smart investment for your home. Whether you choose the Normal or Deluxe option, Hangers Wala ensures quality, convenience, and satisfaction. If you are looking for a budget-friendly solution, the Normal model is a great choice. But if you want long-term durability, premium quality, and peace of mind, the Deluxe model is the best option. Upgrade your home today with a reliable Ceiling Cloth Hanger from Hangers Wala and enjoy hassle-free drying every day.
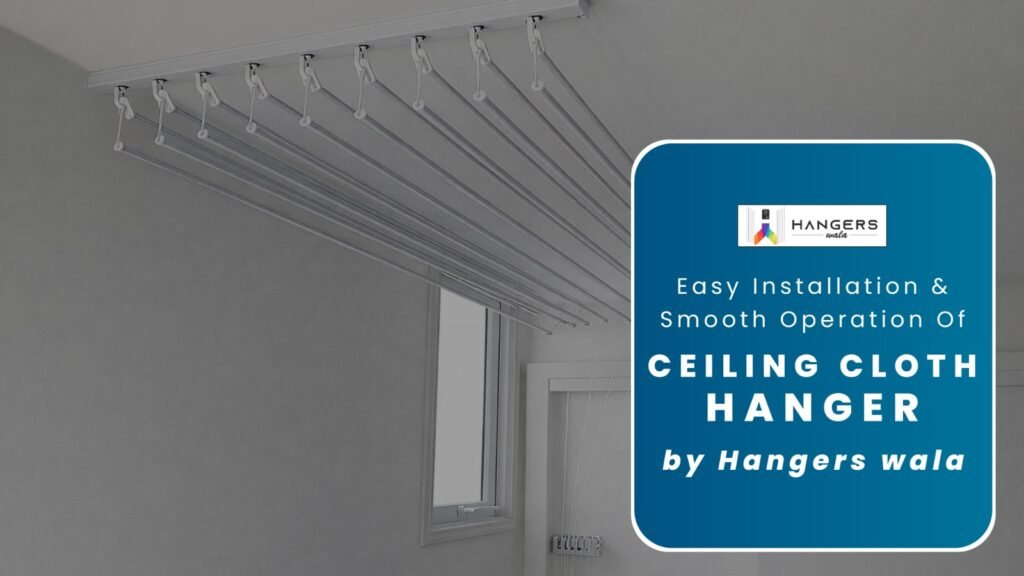
In modern homes, space management plays a very important role. Especially in apartments and compact houses, drying clothes can become a daily struggle. Traditional drying stands take up floor space, block movement, and make balconies look crowded. That’s why many homeowners today prefer a smart and space-saving solution like a Ceiling Cloth Hanger. Hangers Wala brings you a premium quality Ceiling Cloth Hanger designed for easy installation and smooth operation. This system is strong, durable, user-friendly, and perfect for everyday use. In this blog, we will explain everything in detail — especially the deep installation steps — so you clearly understand how professionally it is set up. Why Choose Hangers Wala Ceiling Cloth Hanger? Before we go into installation steps, let’s understand why Hangers Wala is a trusted name. Strong and durable materials Smooth pulley operation Space-saving design Professional installation support Long-lasting performance A Ceiling Cloth Hanger from Hangers Wala is not just a drying system; it is a complete upgrade for your balcony or utility area. Installation Steps of Ceiling Cloth Hanger Proper installation is the most important part of ensuring smooth operation and long-term durability. Below are the complete deep steps followed by the Hangers Wala professional team. Step 1: Site Inspection and Area Analysis The first step is a detailed inspection of the installation area. Ceiling strength is checked carefully Balcony or utility space is measured Proper location is selected for maximum air flow Wall support area for pulley is finalized This step ensures the Ceiling Cloth Hanger is installed in the safest and most efficient position. Step 2: Accurate Measurement and Marking After inspection, exact measurements are taken. Distance between ceiling hooks is measured Parallel alignment is checked Marking points are drawn on the ceiling Wall marking is done for pulley bracket Proper marking is very important because incorrect alignment can affect smooth lifting. Step 3: Drilling the Ceiling Now the technical process begins. Heavy-duty drilling machine is used Holes are drilled to proper depth Dust is cleaned from holes Surface is prepared for anchor fitting Drilling is done carefully to maintain ceiling strength and stability. Step 4: Anchor Bolt Installation Anchor bolts are inserted into the drilled holes. High-quality anchor bolts are used Bolts are tightly fixed inside ceiling Grip strength is tested Stability is double-checked Anchor bolts are the base support of the Ceiling Cloth Hanger. Strong anchoring ensures safety. Step 5: Hook and Base Frame Fixing After anchor bolts are secured, hooks are installed. Heavy-duty hooks are tightened properly Frame alignment is verified Equal balance is ensured Support strength is tested This step prepares the main hanging structure. Step 6: Stainless Steel Rod Assembly Now the drying rods are assembled. Stainless steel rods are inserted into the frame Equal spacing is maintained Rod alignment is checked Straight positioning is ensured Strong rods ensure that clothes dry properly without bending or imbalance. Step 7: Pulley Bracket Installation on Wall The pulley system is installed on the wall. Wall strength is checked Pulley bracket position is marked Screws are drilled and tightened Pulley wheels are fixed securely The pulley system plays a key role in smooth operation. Step 8: Rope Threading Process This is a critical step. Rope is passed through each pulley wheel Correct threading pattern is followed Knots are securely tied Rope tension is adjusted properly Incorrect threading can cause jamming, so this step requires precision. Step 9: Height Adjustment and Balancing After rope setup, height adjustment is done. Frame is pulled down and lifted up Comfortable operating height is set Locking system is checked Smooth movement is tested This ensures that users can operate the Ceiling Cloth Hanger easily. Step 10: Load Testing and Stability Check Before final approval, load testing is performed. Frame is lowered and tested Upward lifting is checked Side balance is verified Smooth glide of pulley is confirmed This step guarantees safety and durability. Step 11: Final Tightening and Finishing Now the finishing work is done. All bolts are re-tightened Rope ends are neatly finished Area is cleaned Customer is given a complete usage demo Hangers Wala ensures that installation is neat and professional without damaging your walls or ceiling. Smooth Operation for Everyday Comfort Once installed, the Ceiling Cloth Hanger works effortlessly. You simply pull the rope to lower the rods, hang your clothes comfortably, and then lift it back toward the ceiling. The pulley system makes lifting smooth and easy. Benefits include: No need for stools or ladders Less physical strain Safe for elderly family members Perfect for daily use The smooth movement is what makes Hangers Wala different from ordinary drying systems. Space-Saving and Stylish Design A Ceiling Cloth Hanger keeps your floor area free. Your balcony looks clean and organized. When not in use, the hanger stays near the ceiling, maintaining open space. This makes it perfect for: Apartments Compact homes Modern interiors Utility areas It improves both functionality and appearance of your home. Durable and Low Maintenance Hangers Wala uses premium quality materials that resist rust and corrosion. This makes the Ceiling Cloth Hanger ideal for balconies exposed to sunlight and moisture. Maintenance is simple: Occasional cleaning Basic rope inspection Regular smooth usage The system is designed for long-term performance. Why Professional Installation Matters Improper installation can lead to imbalance, rope jamming, or ceiling damage. That is why Hangers Wala provides trained professionals for installation. With expert fitting: Safety is ensured Alignment is perfect Operation remains smooth Long life is guaranteed Professional setup makes a big difference in overall performance. Final Thoughts The Easy Installation and Smooth Operation with Hangers Wala Ceiling Cloth Hanger is the perfect solution for modern homes. It combines strong installation, smooth pulley mechanism, space-saving design, and long-lasting durability. If you are looking for a reliable, easy-to-use, and professionally installed Ceiling Cloth Hanger, Hangers Wala is the right choice. Upgrade your drying experience. Keep your home clean and organized. Choose Hangers Wala Ceiling Cloth Hanger for comfort, safety, and convenience every day.
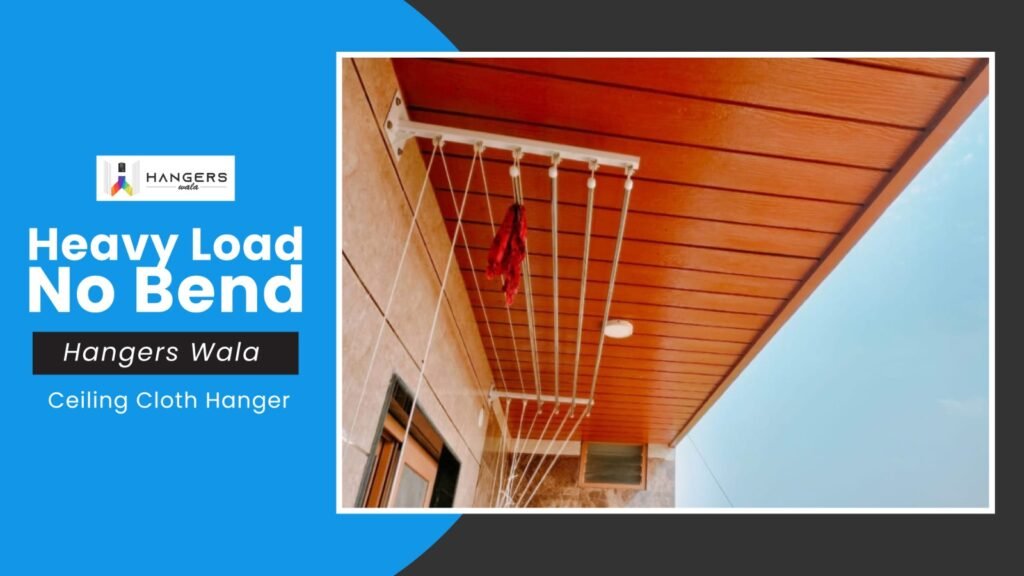
In today’s modern homes, space is limited but laundry is never-ending. From daily office wear to heavy bedsheets and blankets, every home needs a reliable drying solution. That’s why Hangers Wala brings you a powerful and durable Ceiling Cloth Hanger designed especially for heavy loads with no bending issues. If you are tired of weak rods that start sagging after a few months, or drying systems that cannot handle heavy wet clothes, this guide will help you understand why bending happens, how much load is safe, and what precautions you should take to ensure long-lasting performance. Why a Strong Ceiling Cloth Hanger Matters A Ceiling Cloth Hanger is installed on the ceiling, allowing you to use overhead space efficiently. It keeps your balcony or utility area clean and clutter-free while providing proper airflow for faster drying. However, not every hanger in the market is made for heavy usage. Many low-quality products bend because they are made with thin rods or poor materials. A heavy-load Ceiling Cloth Hanger from Hangers Wala is specially designed to handle daily laundry needs without losing its shape. It is built for strength, balance, and durability — making it a smart investment for every household. How Much Load Can It Handle? A heavy-duty Ceiling Cloth Hanger is designed to carry multiple wet garments at the same time, including: Bedsheets Blankets Jeans Towels Curtains School uniforms Office wear Wet clothes are much heavier than dry ones because they absorb water. That is why strength and quality matter. Hangers Wala designs its Ceiling Cloth Hanger models to support heavy household laundry loads comfortably when used correctly. The key is not just load capacity, but proper usage and balanced weight distribution. Why Do Ceiling Cloth Hangers Bend? Many customers complain about bending rods. Let’s understand the real reasons behind it: 1. Poor Quality Material Thin metal pipes or low-grade iron rods are the biggest reason for bending. When material strength is low, it cannot handle repeated heavy usage. 2. Overloading Every Ceiling Cloth Hanger has a recommended load limit. If clothes beyond its capacity are placed regularly, the rods may start sagging over time. 3. Uneven Weight Distribution If all heavy items are placed on one side or on a single rod, pressure increases at one point. This creates imbalance and causes bending. 4. Weak Installation Improper drilling or low-quality fasteners reduce the strength of the entire system. Even a strong rod can bend if installation is not secure. 5. Rust and Corrosion In balconies or open areas, moisture exposure is common. If the material is not rust-resistant, it weakens slowly and becomes prone to bending. How Hangers Wala Prevents Bending Hangers Wala focuses on durability and long-term performance. Here’s how the brand ensures a no-bend experience: ✔ Premium Grade Materials The Ceiling Cloth Hanger is made using high-quality aluminum or stainless steel that resists rust and corrosion. ✔ Strong and Thick Rods The rods are designed to remain straight even after continuous heavy usage. ✔ Secure Ceiling Mounting Heavy-duty fittings ensure firm attachment to the ceiling, preventing imbalance. ✔ Smooth Pulley Mechanism If you choose a pulley model, it operates smoothly without sudden jerks, reducing stress on the structure. ✔ Designed for Indian Homes Indian households often wash multiple heavy clothes together. Hangers Wala understands this and builds products accordingly. Important Precautions to Avoid Bending Even the strongest Ceiling Cloth Hanger requires proper care. Follow these precautions: Distribute Weight Evenly Always spread heavy clothes across all rods. Avoid placing everything on one rod. Avoid Overloading Do not exceed the recommended usage capacity. Using the product within limits ensures longer life. Lift Gently If using a pulley system, raise and lower it smoothly. Avoid sudden pulling or jerking. Regular Check Occasionally check screws and fittings to ensure everything is tight and secure. Professional Installation Always choose expert installation provided by Hangers Wala for maximum safety and performance. Perfect for Everyday Indian Laundry Needs From family-sized washing loads to seasonal heavy blankets, Indian homes require a dependable drying solution. A strong Ceiling Cloth Hanger ensures: Proper air circulation Organized balcony space No floor clutter Neat and modern appearance Long-lasting performance It is suitable for apartments, villas, compact homes, and high-rise buildings where space optimization is important. A Long-Term Investment Buying a cheap hanger may save money initially, but bending issues lead to replacement costs and inconvenience. A heavy-load, no-bend Ceiling Cloth Hanger from Hangers Wala offers: Durability Stability Rust resistance Strong performance Peace of mind It is not just a drying system — it is a smart lifestyle upgrade. Final Thoughts A bending cloth hanger can create daily frustration and safety concerns. Choosing a strong, high-quality Ceiling Cloth Hanger ensures smooth and stress-free laundry management. Hangers Wala delivers a heavy-load, no-bend solution built for real household needs. With premium materials, secure installation, and proper usage, you can enjoy long-term performance without worrying about sagging rods. If you want strength, reliability, and a clean balcony look, choose Hangers Wala Ceiling Cloth Hanger — where heavy load meets zero bend confidence.
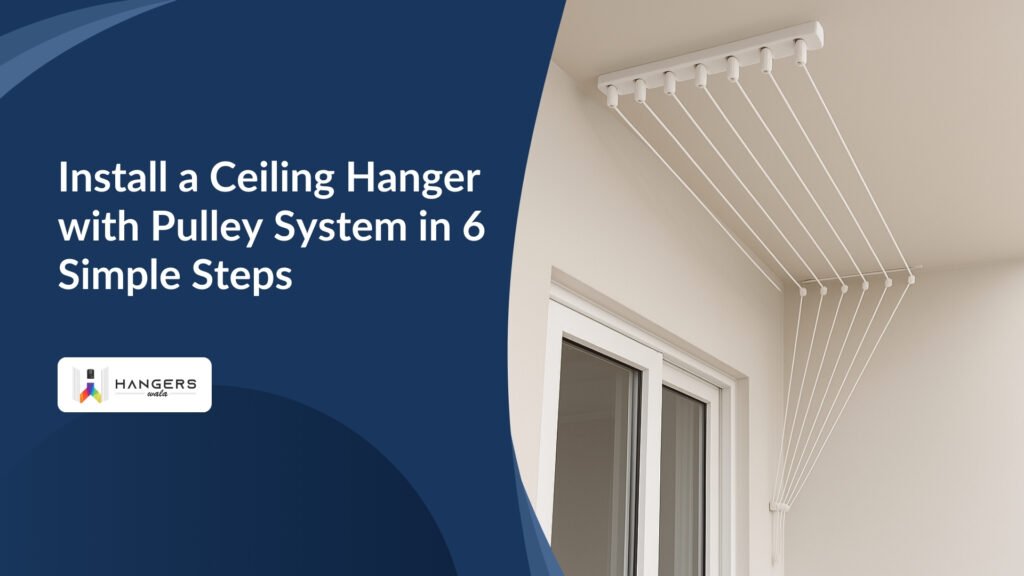
A ceiling hanger with a pulley system is an excellent space-saving solution for drying clothes indoors. It allows you to conveniently lift and lower clothes without taking up extra floor space, making it perfect for apartments, balconies, and laundry rooms. Unlike traditional drying racks, a pulley-operated hanger keeps your clothes organized, improves air circulation, and prevents clutter. Installing a pulley cloth hanger might seem complicated, but it’s actually a simple process that can be done with basic tools. Whether you’re setting it up for the first time or replacing an old drying system, follow these six easy steps to ensure a secure and hassle-free installation. Step 1: Choose the Right Location Selecting the right spot for your pulley ceiling hanger is crucial for easy operation and efficient drying. Consider the following factors: Good Airflow & Sunlight: Install the hanger in a balcony, laundry area, or near a window for faster drying. Sufficient Ceiling Height: Ensure the ceiling is high enough for proper lifting and lowering of clothes. Wall Clearance: Keep enough distance from walls to prevent clothes from touching and getting dirty. Easy Accessibility: Choose a spot where you can comfortably operate the pulley system without strain. A well-chosen location makes drying convenient, efficient, and hassle-free! Step 2: Mark the Drill Points Properly marking the drill points ensures a balanced and stable pulley hanger installation. Follow these key steps: Measure the Distance: Use a measuring tape to determine the correct spacing between pulley brackets for even weight distribution. Ensure Proper Alignment: Mark the points in a straight line to prevent tilting or imbalance when the hanger is in use. Use a Pencil for Marking: Lightly mark the drill spots to avoid mistakes and adjust if needed before drilling. Double-Check Before Drilling: Verify the markings to ensure they match the hanger’s design and rope positioning. Accurate markings help achieve a smooth and sturdy pulley system installation! Step 3: Install the Pulley Brackets Securing the pulley brackets properly is essential for a strong and durable installation. Follow these steps for a perfect setup: Drill at Marked Points: Use a drill machine to make holes at the marked spots on the ceiling. Insert Wall Plugs: Place sturdy wall plugs into the holes to ensure a firm grip for the screws. Fix the Pulley Brackets: Align the brackets properly and tighten them with strong screws for maximum support. Check Stability: Gently pull the brackets to ensure they are firmly fixed and can handle the hanger’s weight. A well-installed pulley bracket ensures smooth and safe operation of your ceiling hanger! Step 4: Attach the Ropes and Rods Properly attaching the ropes and rods ensures smooth operation and long-lasting performance. Follow these simple steps: Thread the Ropes Through the Pulleys: Pass the nylon ropes through the pulleys, ensuring they move freely without friction. Attach the Ropes to the Rods: Securely tie or fasten the ropes to the hanger rods, making sure they are evenly balanced. Ensure Equal Rope Length: Adjust the ropes so that the rods remain level when lifted or lowered. Check for Smooth Movement: Pull the ropes a few times to ensure effortless lifting and lowering without tangling. A well-secured rope and rod setup ensures easy operation and durability of your ceiling hanger! Step 5: Fix the Rope Lock Mechanism Installing the rope lock mechanism correctly ensures your hanger stays securely in place. Follow these simple steps: Choose a Convenient Spot: Fix the rope cleat or locking mechanism on a nearby wall at an easily reachable height. Secure the Lock Firmly: Use screws and wall plugs to tightly fix the lock, preventing any loosening over time. Thread the Ropes Properly: Pass the ropes through the lock mechanism, ensuring they hold the hanger firmly at different heights. Test the Locking System: Pull and secure the rope to check if the lock holds the hanger in place without slipping. A well-installed rope lock mechanism ensures smooth, safe, and effortless use of your ceiling hanger! Step 6: Test the Pulley System Once the installation is complete, testing the pulley system ensures smooth and safe operation. Follow these steps: Lift and Lower the Hanger: Pull the ropes to check if the hanger moves effortlessly without resistance. Ensure Smooth Rope Movement: Make sure the ropes glide freely through the pulleys without tangling or friction. Check for Balance: The rods should remain level and stable when raised or lowered to avoid clothes slipping off. Test the Rope Lock Mechanism: Secure the hanger at different heights and ensure the lock holds firmly without slipping. Make Final Adjustments: If needed, tighten screws, align pulleys, or adjust rope tension for perfect functionality. A properly tested pulley system guarantees long-lasting, hassle-free operation for daily use! Conclusion Installing a ceiling hanger with a pulley system is a simple yet effective way to save space and make drying clothes effortless. By following these six easy steps, you can set up a sturdy and efficient drying system in your home. From choosing the right location to testing the pulley system, each step ensures smooth operation and long-term durability. A well-installed pulley cloth hanger not only keeps your home organized but also makes laundry hassle-free. With proper installation and maintenance, you can enjoy a convenient, space-saving, and user-friendly drying solution for years to come! Get a High-Quality Ceiling Hanger Today – Easy to Install & Built to Last! Reach Out Now! Call: 63008 54322

Ceiling cloth drying hangers save space and dry clothes efficiently. Choosing high-quality hangers ensures durability, smooth operation, and long-term use, making them a smart addition to modern homes. Best Material Quality Ceiling cloth drying hangers are made from durable materials like stainless steel, nylon ropes, and metal brackets, ensuring strength, rust resistance, and long-lasting performance for everyday use. Stainless Steel Stainless steel is rust-resistant and highly durable, ensuring long-lasting performance. It can handle heavy loads without bending, making it ideal for ceiling cloth drying hangers in humid or outdoor environments. Nylon Ropes Nylon ropes are known for their tensile strength, providing reliable support for wet clothes without fraying or stretching, ensuring smooth and effortless operation in ceiling cloth drying hangers. Metal Brackets Made from metal, these brackets offer enhanced stability and ensure secure mounting, providing reliable support for ceiling cloth drying hangers and safe, durable use. Screws and Fasteners The screws and fasteners in ceiling cloth drying hangers are made from durable materials like stainless steel, offering rust resistance and ensuring secure, long-lasting mounting. Pulley Mechanism The pulley mechanism in ceiling cloth drying hangers is made from durable stainless steel or high-quality plastic, ensuring smooth operation and long-lasting performance. Innovative Design Ceiling cloth drying hangers offer adjustable height for convenience, ensuring better airflow and faster drying. Their compact design saves space, making them ideal for small homes, and maximizing ceiling space while maintaining functionality. Weather Resistance High-quality ceiling cloth drying hangers are designed to withstand environmental factors like humidity, heat, and rain. Stainless steel and other materials often feature coatings or finishes that provide extra protection against corrosion, ensuring longevity even in outdoor or humid environments. These finishes prevent rust and maintain the hanger’s functionality and appearance over time. Load Capacity Ceiling cloth drying hangers with high load-bearing capacity can support heavier fabrics like towels as well as large quantities of clothes. Strong materials like stainless steel ensure stability, durability, and efficiency, making them ideal for heavy-duty use. Hassle-Free Ceiling Mounting Hassle-free ceiling mounting allows for quick and easy installation, ensuring a stable and reliable setup with minimal effort. Conclusion Ceiling cloth drying hangers offer durability, efficiency, and sleek design, making them a reliable and space-saving solution for your drying needs, ensuring long-lasting performance and convenience. Say Goodbye to Messy Drying Reach Out Now Call: 63008 54322